Today's work is raking big chunks off the ground. I'll explain the intent as we go. For now, I just need a level surface, free of pokey chunks of concrete and debris. I'm going to put 10 mil plastic over this, like the footprint of a camping tent, and I don't want rocks poking through as I work on top of the plastic.
The long rake handle is surprisingly not too bad to work with in this confined space.
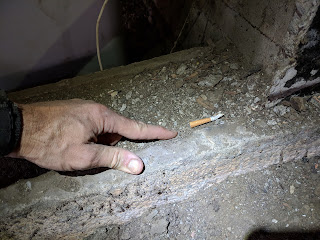
Interesting debris in here. Remodeling was done sometime around 1992 (it's 2018 now), so the most recent debris is 26 years old. Here's someone's 26 year old cigarette butt, just where it was left.
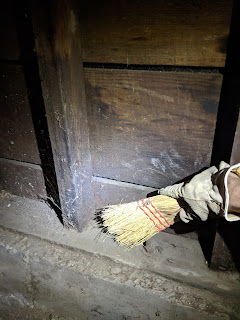
Sweep off the perimeter walls using a small whisk broom (12" corn bristle, stiff). (These will get another pass with a shop vac, after the vapor barrier is in and I can work in a clean space.) I've got my headlamp, safety glasses, kneepads(!), and dust mask, since there is a lot of dust. I took this selfie for the blog:
This type of dust mask is barely functional. Exhaling is directed upward and fogs up the safety glasses. Afterwards, my snot was full of dust that was not filtered by the mask. I ordered a better mask for the remaining work in here. Let's look at this "before" photo below, kind of a haunted house, then talk about crawlspace lore for a moment.
I looked on Amazon for "crawlspace" perimeter tape (subject of next blog post) and saw no less than six different horror or murder movies/books with this word as part of the title. This space gives people fear and anxiety like no other part of a house.
Right, it's a confined space, partially open to the outdoors, no lights; critters and spiders have the run of it; tradespeople want to minimize their time in here, so work is not tidy or logical; just get in and get out. Pipes, wires, debris are simply abandoned. There is a lot of moisture phobia and superstition.
I'm about 3 hours total into earthwork and raking on my second weekend session. I've got it cleaned up as shown in the above photo. I'm rocking an improved respirator that can handle the dust:
There's a big chunk of concrete in here, abandoned around 1992, that must be 400 pounds, judging by it's volume and estimating at 140 lb/ft3. It needs to go. If I were to get it out onto the driveway using levers and rollers, I would still need a way to dispose of it.
After consulting family for ideas, I dig a hole in previous backfill, which is loose and easy going. I set up the concrete monolith on rollers and slide it into the hole. When do you get to use rollers to move something heavy? Can't pass up the opportunity. Dump the tailings onto the monolith, and done. Final resting place.
Important points about dust management. It's the end of the West Coast dry season in September, so the earth everywhere is very dry; it's clay soil that generates fine dust; furthermore, no rain has fallen on this soil in 100 years. I hang a shop fan on coat hooks in my main access door, exhausting the space, putting it under negative pressure. Fresh make-up air is drawn through the perimeter vent holes, and the dust generated by the earthwork migrates to be ejected by the fan. This is a pretty effective setup.
After about five hours of work on three different weekend sessions, I've cleaned and leveled earth over 900 ft2 of crawlspace, including the monolith. Here's a shot looking back across 600 ft2 of work, just before final raking:
Finally, I run a measuring tape and write down the sizes I'll need for my plastic sheets. Next post will be all about the new plastic vapor barrier. We'll do vapor barrier, then air sealing, then perimeter insulation; talk about heat & moisture physics and thermal simulation along the way, and finally get to rebuilding ducts and replacing the gas furnace with a clean air ventilator. In contrast to the haunted house shown above, this thing is going to look like the interior of the International Space Station (ISS) when I'm done:
By NASA [Public domain], via Wikimedia Commons
Come back to the blog to see how this progresses, and what it turns into!


No comments:
Post a Comment